Dusting Off The Incubator
. . .
 Our poultry flock really expanded back in 2013 just after we left our life in the big city and set out to be farmers full time. Each season we’ve been adding new blood to the poultry flock to keep the eggs coming and it’s worked well for us so far.
After relocating our farm last summer, egg production abruptly stopped. I feel it was largely due to the stress of the transition. First, everyone was moved to confinement in chicken tractors. It took us days to catch all the poultry! Imagine us herding poultry up a ramp so they could be loaded in a horse trailer for moving. It was total madness.
 I also think our drop in egg production can be attributed to the age of some in our flock and the natural molting chickens experience. So, this year we’re getting LOTS of new chicks. I’m out buying and hatching like a crazy chicken lady.
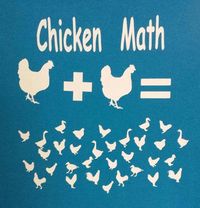
So far, I’ve added the following chicken breeds to our flock in 2018: 3 Sapphire Gem, 3 Lavender Orpington, 3 Asian Blue, 3 White Leghorn, 2 Turken and 4 Easter eggers. Lots of “chicken math” is happening as I visit the feed store every few weeks!
Chicken math: it’s an inside joke with chicken keepers. Your family agrees to get a small flock, but somehow it turns out much larger than you planned!
I’m also on our second hatch with the good ole Brinsea Mini Advance Hatching Egg Incubator It will basically be running non-stop from now until the summer. It’s such a trooper, though I wish I had a bigger incubator sometimes. It’s probably better that I don’t though 😉
Our first hatch was less than ideal, thanks to the house cat knocking over the incubator… two Silkies, an Australop and a Buff Orpington hatched despite the cat’s curiosity.
With new chicks as part of the farm again I’ve been really itching to upgrade our chick brooder setup. In the past, I’ve always defaulted to whatever is the easiest to move around. Sometimes I’ve got a bird cage of chicks in the main chicken house, sometimes they are in a chick brooder hutch in the barn, right after hatch they go in a plastic tub or a smaller bird cage that is always moving. The setup is ever-changing and is largely dependent on their age, heat needs and the current temperatures.

The main issue I have with the pictured setup is the open top- my barn cats would be harassing the chicks all the time! Also it’s something simply we cannot pay for at this point… So I use rock slabs to elevate the waterer and I use cheap plastic tubs to contain the chicks. It’s crude but resourceful, it works for us.

Yesterday I had been keeping about 22 chicks under it (oops!) but have since moved the bigger chicks to another brooder now that they have less heat requirements. Those bigger chicks were store bought and spent about 4 weeks under the warming plate before outgrowing it. I’ve left the chicks from my first hatch as well as my Turken chicks under the warming plate to await the hatch of 7 more of our flocks eggs.
Here is a video peek at the warming plate in action in our current brooder setup: